Wednesday, November 14, 2012

Homemade Kale and Turkey Sausge Soup with Havarti Dill cheese Pumpernickel Toast!

Yuuuummmmy! Homemade soup made with turkey sausage, kale, potatoes, and green onions simmered in chicken broth! This soup was inspired by a friend's soup I had last week. I love MaryBeth's cooking and the soup she made was delicious! I always make homemade soup with the leftover chicken bones or turkey bones. What I mean is, after my family devours all the meat from a whole chicken or turkey, I boil the whole thing. I learned from my grandmother you can always get another meal out of what's left on the bones. In doing that, I get a great chicken broth! That's where you start, with this recipe.
Here's the other items, minus the butter I forgot to put it in the picture. Now I used milk because I didn't have cream, but that also means less calories. Again I didn't measure anything. I just know from my own taste about how much I want to add. I am sure that could be frustrating to those of you that like to know the very amount, so I apologize. But hang on, I'll estimate for you :) !
Potatoes, turkey sausage, kale and green onions. Cut and put into that delicious chicken broth you made prior. Bring all these things to a boil, and don't add your milk yet. Once the potatoes are soft then add your milk and 4tbsp. of butter. I used approximately 2 cups of milk to about 4-5 cups of broth. Add salt, pepper, ground mustard (just a tad). Let all these awesome flavors simmer and spend a little time with each other....I'd say about 10 minutes more. The Havarti Cheese with Dill is for the pumpernickel toast. A great addition, of layers of flavors, to this soup!
Mmmmmmmm.....sure smells good!
You'll love this soup! A great comfort meal during any cold day! A dip of the Havarti Cheese with Dill, pumpernickel toast into the soup will make you smile and fill your belly with warmth and satisfaction! Curl up on the couch and watch a movie. That's how we do it, at My Home @ Carolina Place, now you can @ your home! Thanks for visiting!

Thursday, November 8, 2012

My Friend, Angela's Place!

Welcome to my friend, Angela's place! Angela did her mantel in traditional fall colors and it is beautiful! A variety of awesomeness. I love how it's asymmetrical in design. Let's take a closer look....

If you look closely you can see how Angela stacked things on books, flipped a glass over and placed a votive candle holder on it. So cute! All the foilage she used is artificial but it sure looks like the real thing. Using two different kinds of leaves adds interest and depth to the design.She really has a good eye for decorating. Her home is always cozy and inviting and she always makes things extra special for the holidays!

Here Angela used Pinterest as a resource in decorating. She made the adorable acorn top frame. It was a craft, after seeing it on Pinterest, that she knew she could do. She started by gluing each acorn top on an old frame she had. Then she took a real leaf and twig, glued it to a piece of paper and placed it in her new acorn frame. Didn't cost her a dime! The floating candles with twigs in a vase was also a Pinterest idea. She pulled it off great!

Clustering items for an impactful centerpiece! Silk, fall arrangement with artificial pumpkins, real pumpkins, metal pumpkin, gourds, candle placed in a pool of real acorns, and that wonderful metal owl makes for a simple but elegant masterpiece! I love it!

Great planter idea! Take your summer planter , that you havn't used for fall planting, and put a pumpkin in it instead! Add some berries and leaves to finish it off. Lovely!
Angela used pumpkins on her candlestick sconces instead of candles. She even turned a wine glass upside down with berries tucked in at the bottom and a floral pumpkin, she made on top. What a great idea!
I had to share Angela's sweet potato casserole recipe. It is delicious! 3c ~sweet potato (1 lge. can, 1sm. can), 1c ~sugar, half  cup ~milk, forth c ~soft butter, 2 ~eggs, 1 tsp ~vanilla half tsp ~ salt. Mix put in  13x9 dish. Now for the topping: half stick of melted butter, 1 c ~ self rising flour, 1c ~ brown sugar, 1c ~ chopped nuts(optional). Sprinkle this topping mixture over the sweet potatoes and bake at 350 for 30-45 min. Whew....now that, that is done let's chow down!
For a little extra topping, Angela drizzled some melted brown sugar with butter and Karo syrup, over the top. YUMMY! You'll have to try this one for the holidays, and maybe a glass of wine with it! Thanks for dropping in. hope you enjoyed visiting Angela's home! I know I always do! :)

Tuesday, November 6, 2012

Resourcefulness at it's finest!

It's been about a year since I did these projects, but I thought I would share them with you. I totally redid Chelsey, my daughter's room. I did it "on a dime". I had to be very resourceful and I wanted as many things as I could have for free! That's right FREE! So here goes.....

Chelsey wanted a table beside her bed so she could keep her phone while it was charging through the night. It's a small area, so the table had to be narrow and FREE. I wasn't in the mood to spend money and liked the challenge to see what I could come up with. I took a log from our fire pit area outside, that we sat on, and pressured washed it, and plugged a lot of holes up, with wall joint compound. I wanted it to be smooth. Painted it with some interior, water base paint I had. About three coats. Painted a branch and birds on it! Done! Oh and I polyed it, just one coat. Resourceful and better said, FREE!

Now this awesome light was not my idea. We saw it at a store downtown and had to have it! Free of course. Now they didn't let us have it (it was $80.00....um...no), so we studied it and came to the conclusion we could make this. Sorry I have no pics of making it, it was a while back. I literally cut a branch from a tree in my yard.  First, wire Christmas lights all the way down the branch. Then I cut scraps of fabric I had, about 2'' wide and about 2 feet long.Twisted and wrapped the fabric around the branch. I changed the fabric strips to make it more interesting. Seal the end of fabric with hot glue. After you have covered the branch with the fabric strips, wind ribbon and yarn on top for another texture and interest. We added these butterflies for a little more whimsy. Again Free! I had everything. Most things in these specialty stores are handmade, why not your hand? Be an artist.

Between my daughter and myself, we have a lot of jewelry. Again it's a small room and there is no room for  a jewelry box to go on my daughter's dresser. So a friend gave me this birdcage she wasn't using in exchange for a mini refrigerator (the ones that college students use) I wasn't using. A fair trade I thought. All I had to do was paint it cream with spray paint. I added little glass dishes inside the metal holders, where you would have put bird food and water in, for rings. I used the existing wood perches to put bracelets on. A couple of tin containers in the bottom for earrings. Now that's resourceful!

This is so cute, easy, and free! I had everything. Ribbon, to clip the birds to, clothes pins to hold the birds. The birds are made out of vintage handkerchiefs and sample boards. Sample boards are more durable than cardboard because they are made out of plastic. You can use cardboard, I happen to have the sample board. Glue handkerchiefs to board using Elmer's glue, let dry. Then draw and cut a bird shape out from the dried, glued on handkerchief board. Now if you feel you can't draw a bird, you can get one from the internet and trace it. We hung these from the window....love it! See you can be resourceful with things you already have and make something new and wonderful. Rather it's practical reasons or just to have cute, artsy things to decorate with. I hope to show you her whole room soon...we made a lot more. Sadly her room is rarely tidy or picked up, so this is all I could show for now. :) Keeping it real!

Thursday, November 1, 2012

My Friend, Icely's Place.

I wanted to share with you one of my good friend's home. She has talent and great taste. Icely, yes Icely is her unique, beautiful name, is really into Shabby Chic. She decorated for Fall with these great, soft, white and pale blue colors. Who knew you could decorate with shades of blue for Fall. She certainly did, and it looks wonderful! Very Chic....Shabby Chic!

I love this whole table centerpiece! Burlap runner, robin egg  blue acorns in the branches. Adorable ceramic birds placed on candle holders.Cream glass pumpkin and gourd, birdcage with lit candle, a random branch, etc. etc. All placed in this wood shadow box! Awesome!

Real white mini pumpkins decorated with vintage ribbon and buttons. Oh and notice the great silk fabric pumpkin with a cork for the stem....so cute! Icely made and decorated these pumpkins with total Shabby Chic skill!

Here's some traditional orange.....Fall leaves with a pumpkin and gourds, berries placed in a old vintage Coke Cola bottle crate! So creative!


I love the monochromatic theme of the fireplace Fall decorations. Icely kept it simple and sophisticated using colors that were on the same color pallet. A log tealight log, that her good friend (me) made for her is the center point of the mantel, along with the Fall banner she made from burlap and twine. The vases filled with tall dried flowers flanking the mirror makes for an impactful and dramatic design. Love the basket filled with a variety of pumpkins and pine cones. A vase filled with branches and lights and acorns gives this fireplace whimsy.

Here's a closer look. Cute owls to left and right continue the whimsy. Candles and acorns finish the look.....love, love, love!

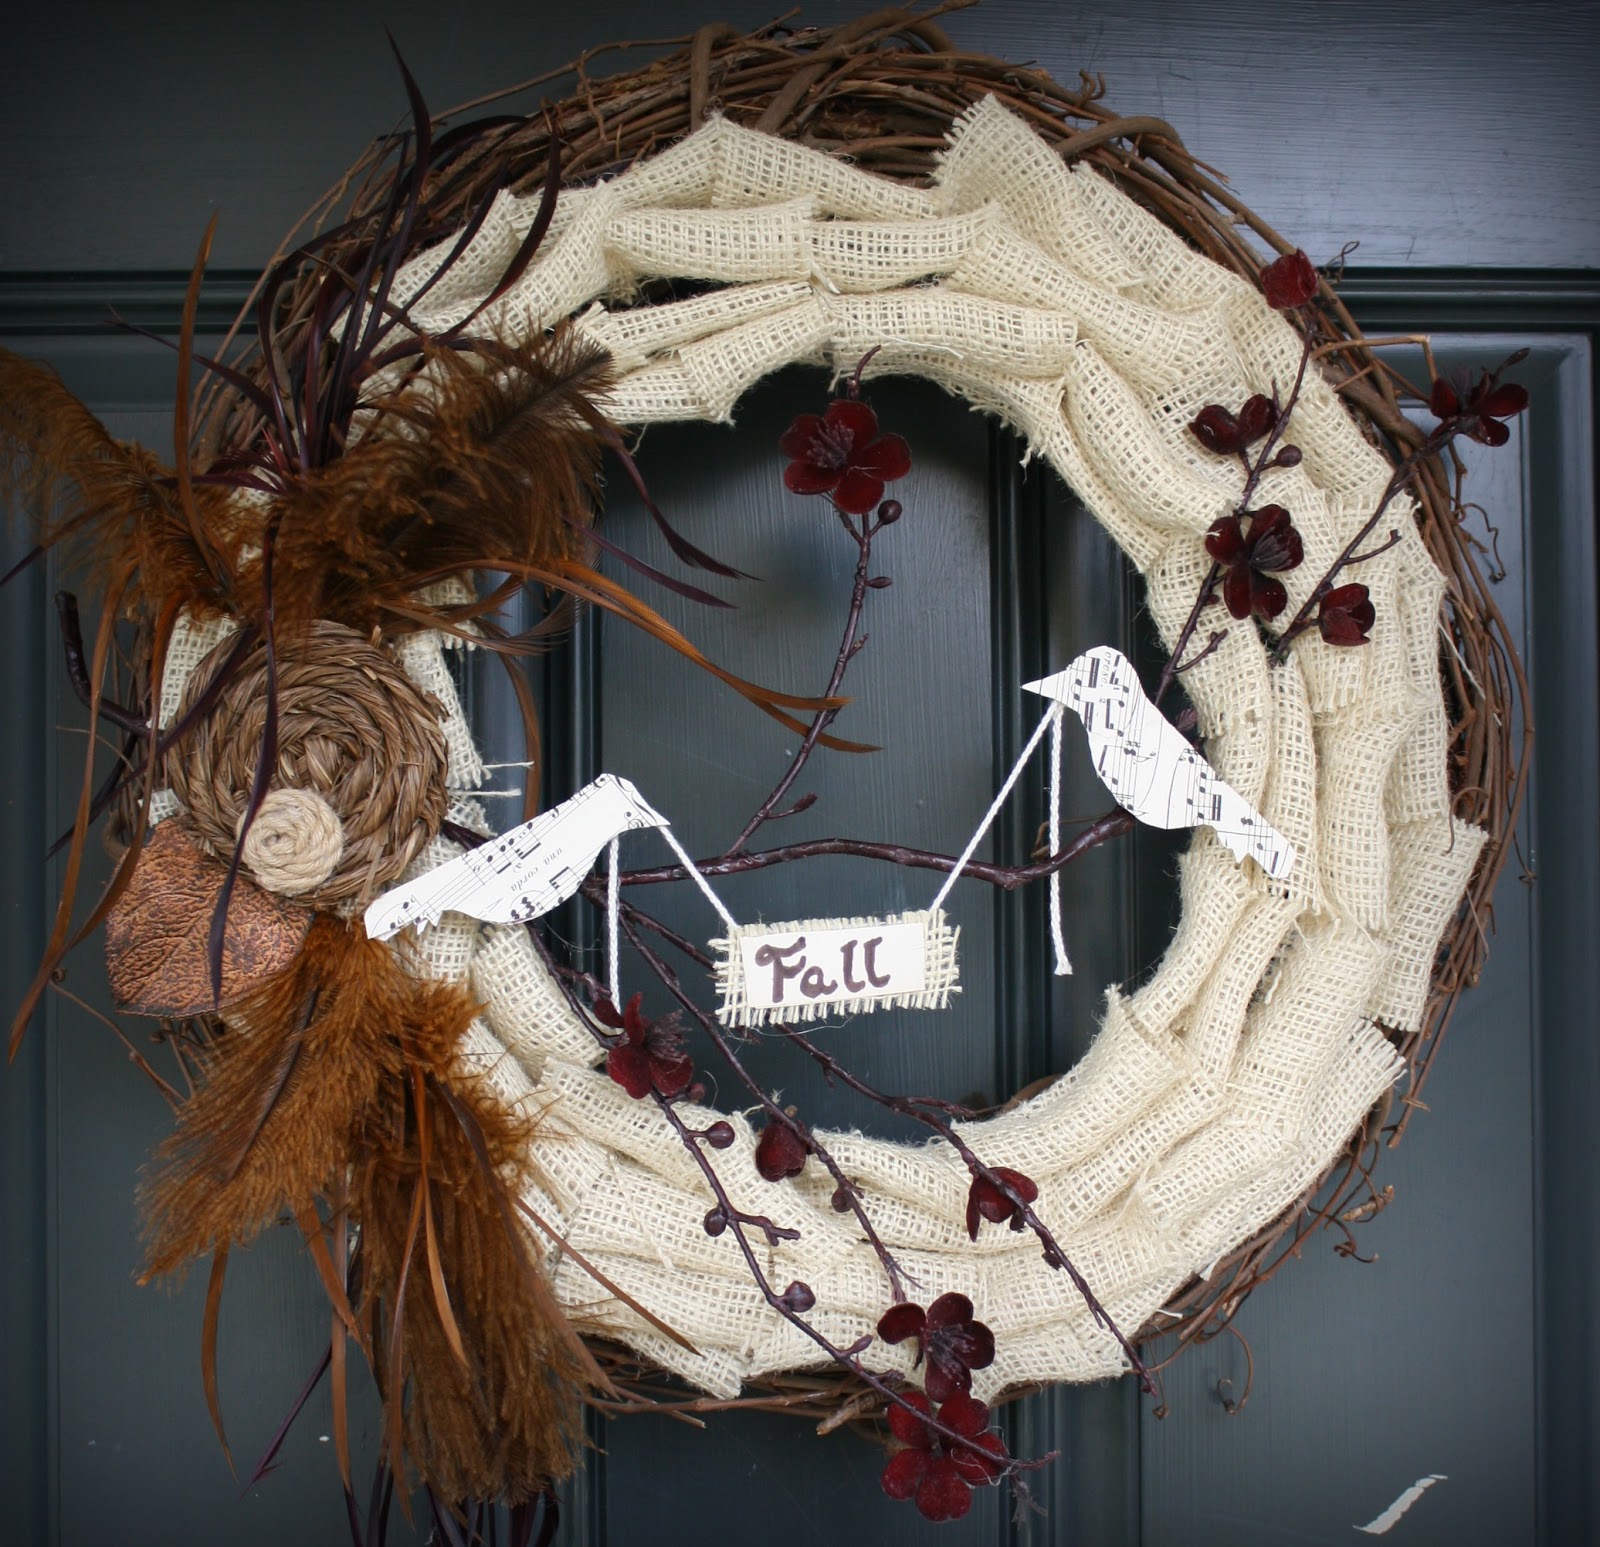
Icely made this wreath with feathers and cream burlap. Two adorable birds made out of sheet music holding a  Fall banner. Lovely and unique. I hope you enjoyed these ideas from Icely's home. She really thought outside the box with the blue and incorporated her gifts and talents in making homemade items. Hope you were inspired and have courage to try something new. Go be creative!

Thursday, October 25, 2012

Rosemary Pork with Ginger

This pork recipe is easy!
What a great combination. Rosemary and Pork...oh and the third party, Ginger. I used pork loin, which is almost always tender. It is a cut made from the top part of the rib cage. I actually bought a roast and sliced it into chops. It's cheaper this way, and I control the thickness of the cut.
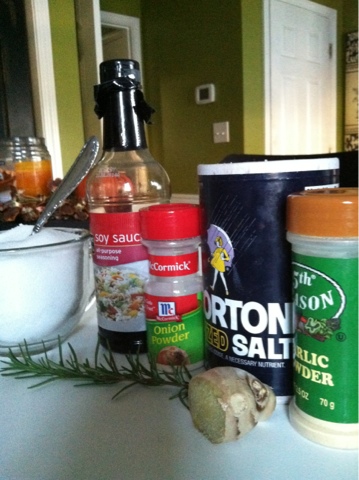
These are the ingredients I used. I didn't measure anything. Yes I am one of those people. Sorry, but I will walk you through what I basically did. I added salt, onion powder, and garlic powder. Don't judge me for using garlic powder, I was out of fresh garlic :( . So moving on.....a few sprigs of rosemary, finely chopped and fresh ginger, that I grated. Add soy sauce and a little water for the pork to cook in and sprinkle sugar over the dish before popping it in the oven. I baked it at 400 F for about 30 minutes. The sugar adds a savory, slight sweetness, which is always great with pork. I love the fresh ginger. My kitchen smelled so great while this was cooking.
Have enough of the sauce (soy, water, ginger, rosemary, garlic, salt, sugar and onion powder) to where it's not quite covering the top of the pork. Cover with foil. Now I know I didn't tell you how much of each ingredient to use, but use your own taste buds to tell you. You've used them all before....you know what you like.
Rosemary potatoes for a side. Simply cut potatoes and red onions and rosemary. Sprinkle with olive oil, salt and pepper add garlic. Mix it well so that the oil and seasonings have covered the potatoes.  I threw these in the oven uncovered, along with the pork . They cook in the same amount of time. How great is that?!
Voila! Add some green beans( the one green veggie ALL my family will eat) with this meal to finish it off. Easy and fast. Enjoy!

Mr.Owl

I wanted to create an owl all from nature. The best part about this project is it's FREE! Not to mention cute!
I had such a great response over this little guy, that i decided to put him in my blog and share him with you!
I started with a log. Cut it down til it's about 5-6 inches. He's going to be a chunky owl.
I used a jig saw to cut an angle in the front to give a "little owl" shape to his face.
Can you see him starting to come alive?
I used pine cones for his feathered chest. Just pull the layers off of the pine cone and start to hot glue from the bottom to the top. I used two different acorn "caps" for the eyes (I went back and added paint to the inner acorn, so his eyes would show up better). The fury ones I glued backwards and put the other one inside. Then I used a little disk I had cut from a limb and using scissors cut it to a quarter (slice of pie shape).
Added sticks for eyebrows (I hadn't cleaned off the extra glue yet when I took this picture...don't forget to do that). Acorn "caps" for the wings, moss for his head. Done! Hello Mr .Owl, you sure are cute! You don't have to spend a lot of money on these cute little nature critters in the stores....go make your own! Have fun, and stop by again!

Tuesday, October 23, 2012

Nature Inspirations!

My recent trip to the mountains, inspired me a lot when decorating this table. In this post I will show you three Fall candle ideas. Two were inspired by Pinterest with my added touch to make it my own! Some things I like to copy, but most of the time I want to put my spin on it so it's more unique. I used sticks I found in the woods, they already had pine cones on them....perfect! Just put them in a glass vase. Repainted an old craft pumpkin cream, painted another black with our initial, and placed it in an urn I had. Added real mini pumpkins, birds, even a succulent plant. All Nature...Love!

This tealight log idea I got from Pinterest but I added the moss and acorns for more interest. I saw moss all over logs and trees through the trail in the mountains. It was beautiful.

I added dried flowers from my yard and pine cones. I used a 1.5 Wood Boring bit in my drill to cut out the holes in the log. The tealights fit good and snug.
See how nature can inspire you? I'll just take a log and make beauty with it!

I thought this was so pretty, thus inspiring the moss on my tealight log.

This is pretty simple. The two candles on the right, I got straight from Pinterest. It was easy! You just cut an old sweater to fit your candle and hot glue it in the back. I used the sleeves and left the edge of the sleeve so I could flip it at the top. Added a real leaf with string and your done. To the left I added some burlap to a candle, some string and added a dried "thingy". Not sure what it is, but I like it.

Here's a closer view. I cut another log,  that had split, laid it on it's flat side. Again I added moss and acorns. I really like how it looks. It's a different way to display a candle, that's all from nature, but very impacting!

This is something I did last year. I wasn't bored with it this year, so I used it again. I just wrapped some awesome bark around a candle, added a satin ribbon and an adorable butterfly. You didn't know that bark could be so awesome, did you? I again hope you were inspired. Let nature teach you a thing or two about how to decorate....I did!